Recipe for a successful phishing campaign (2/2)
Recap: In part 1 we saw general considerations you should keep in mind in order to start setting up your infrastructure, as well as technical steps to setup your domain with SPF and DKIM records. In this part we’ll get to a score of 10/10 and I’ll show you how to manage big campaigns, as well as 10 tips at the end to improve your reception percentage. We’ll also talk about SMTP relays and when you should use them.
DNS records
After you’re done setting everything up in Part 1, you should have between 6 and 9 DNS records. Lets explain them.

- Between 1 and 3 NS records, delegating your domain to your cloud provider’s name server records (in my case, the last 3 records are for digital ocean name servers)
- An A record pointing your domain to your VPS IP.
- An A record pointing the subdomain we’re going to use to setup spf (in my case mail.totallyrealdomain.com) to your VPS IP.
- A TXT record for SPF.
- A TXT record for DKIM.
- An MX record pointing to mail.yourdomain.com
Tuning our content
After trying our first mail, we got a 6.5/10. Lets try to improve this.
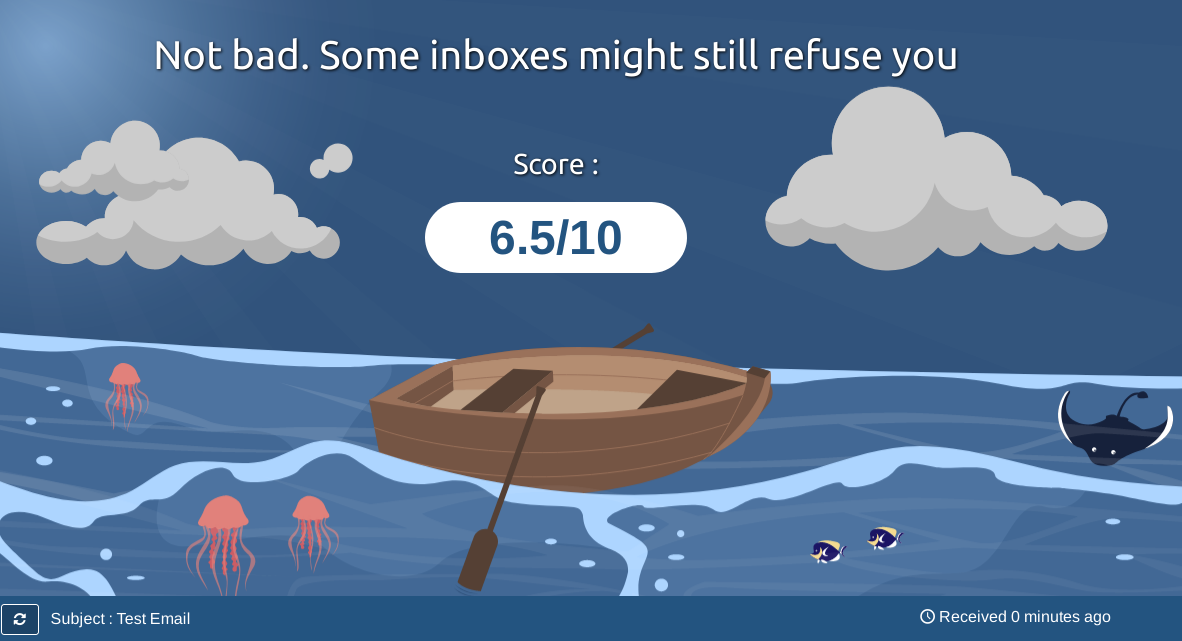
We might pass a few spam filters, but we can do better. Lets see what is lowering our score.


All of these settings are associated with the contents of the email and not with our setup. So lets modify our email.
We can explain most of the results we got by understanding that we sent a simple mail with the mail command (from the mailutils package)
echo "Testing mail" | mail -s "$(echo -e "Test Email\nFrom: John Doe <no-reply@totallyrealdomain.com>\nReply-to: no-reply@totallyrealdomain \nContent-Type:text/html\n")" -r no-reply@totallyrealdomain test-s211hrdl7@srv1.mail-tester.comMails can come in many formats like html, plain-text, etc.. We didn’t specify any header or any format, and mail-tester seems to default to html emails, so we basically sent an implicit html email without any html content or mime-type. Lets analyze each warning individually.
HTML_MIME_NO_HTML_TAG
To resemble any half-decent looking real mail, we need html content. This means html tags. But we didn't send any.
MIME_HEADER_CTYPE_ONLY
This means we should specify a Content-Type header with a valid MIME value.
MIME_HTML_ONLY
Remember how we said that mail-tester interprets the mail as html by default? Well, a good email should have two versions of the same content. An html version for mail clients which support it, and a text version for the most simple ones.
Putting it all together
Unfortunately, mail-tester.com only lets you test your email 3 times, and we already spent 2 on the infrastructure side of things. So lets fix all of the content in one go. We can create an html email, and send it using the command line. As much as I like mailutils, it isn’t the best tool to send html emails. Lets try with postfix’s own sendmail.
You can find the code of my template email here.
Lets modify the destination and send it with:
sed -i 's/destinationEmail/test-zxmlxbuke@srv1.mail-tester.com/g' template.html
sendmail -i -t <testMail.html
You might be wondering, why replace the header in the template instead of just doing:
sendmail destination@desmail.com -i <testMail.htmlWell, if you send the email without a To: header, you’ll get a lower rating:

So always make sure to insert this header. Anyways, lets check our score:

There we go! A perfect 10/10.
This setup is enough if we want to spearphish a couple of targets on our assessment, possibly with a link or an attachment. This is a great way of getting initial access to a company when red teaming. If you want to generate malicious attachments, one tool you should look into is unicorn. It has support for macro attacks, HTA and DDE. And if you’re trying to spearphish something that involves 2FA, you can do this using a proxy like Modlishka (as well as multiple other cool attacks, like 301 redirect cache poisoning to de authenticate Tor users, but let’s not get off-topic).
Our previous approach though, is not really effective when you’re looking to asses your employees security level. To do this you need a way of sending mail to multiple users, and getting statistics about specific events (times your link has been clicked, how many users opened it, etc..). Its not easy to manage statistics for 1000 sent mails using just CLI tools.
To do this we need a framework, and in my experience, the best tool for this is Gophish. Its not only free and open-source, but also really easy to use.
mkdir gophish
cd gophish
wget https://github.com/gophish/gophish/releases/download/v0.10.1/gophish-v0.10.1-linux-64bit.zip
unzip gophish-v0.10.1-linux-64bit.zip
chmod +x gophish
./gophish
This will start two services listening on port 80 and 3333.
Port 80 will host your phishing site, and port 3333 will allow you to connect to the admin console. After that you need to define
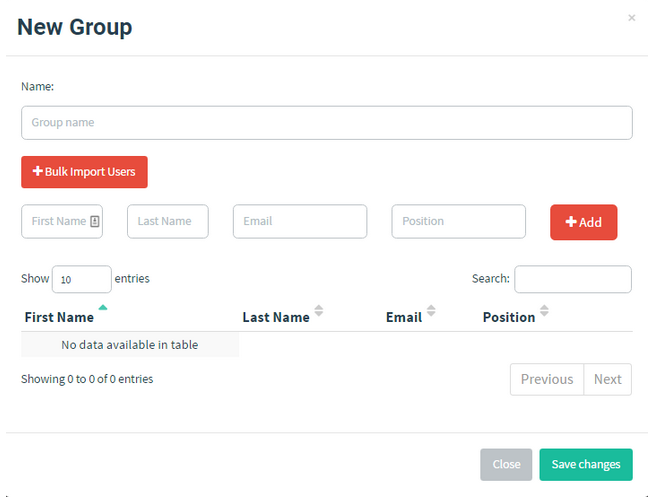
- A sending group that specifies the targets
2) A sending profile if you need to use an SMTP relay (we’ll talk a little more about this later in the next part).

3) A mail template for the email you want to send.

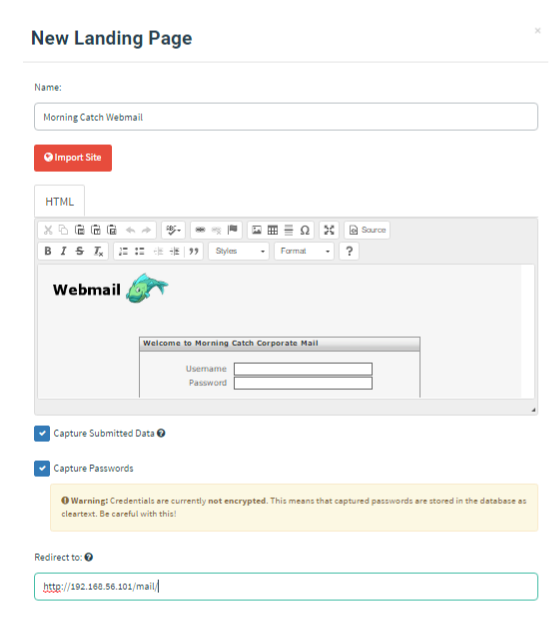
4) A landing page for the phishing.
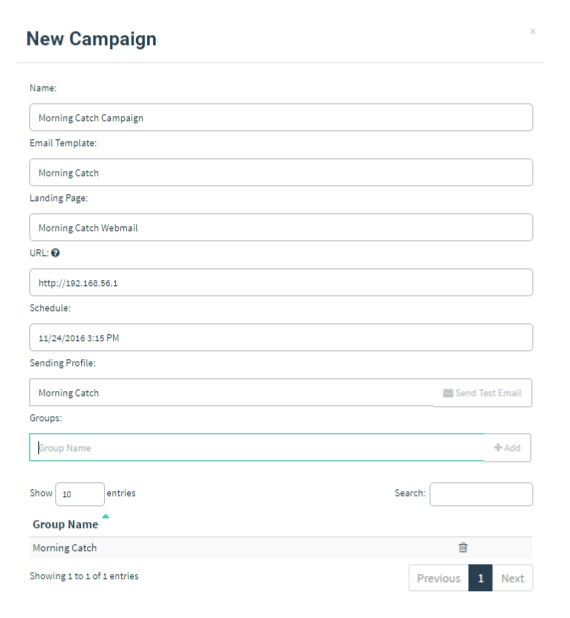
5) After all the previous steps, you’ll be able to schedule and launch a campaign.
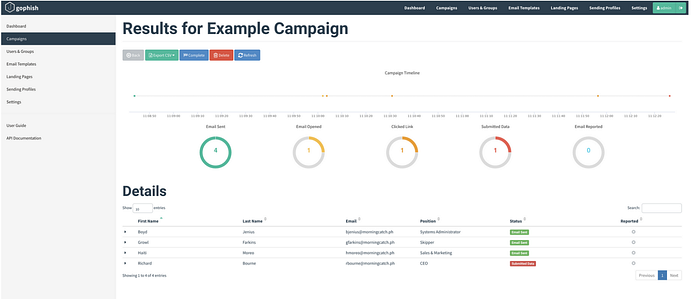
With Gophish you’ll be able to get a dashboard with statistics such as number of opened mails, clicked links, submitted data, etc…
SMTP relays
We haven’t had much success with smtp relays. Out of all the free ones we tried, the ones we had most success with are Mailchimp and Sendgrid. You can setup your login credentials on Gophish’s sending template, or you can manually configure the relay on postfix. The biggest advantage of this approach is that you’ll be using your relay provider’s servers, which probably have an established reputation on most spam filters. Another advantage of this approach is that even if outbound port 25 is blocked, you might get away with using outbound port 587 from your relay. The biggest downside is that to send a decent amount of mails, you need a paid account. They usually start at about 10 U$D a month.
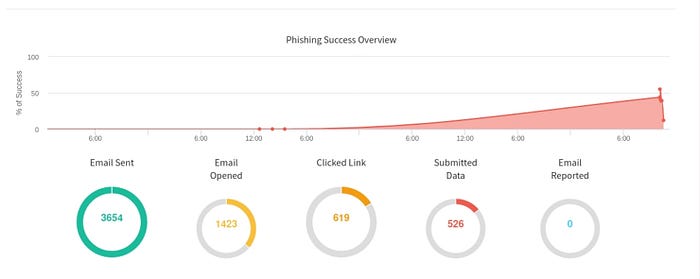
Using the free plans we usually manage to send about 200–500 successful emails before getting flagged for excessive usage. So depending on the clients size, we just use our own server, or we divide our targets in different groups and use different free accounts for each group (and of course, limit the email addresses to about 100 per group). You can see here a screenshot of the results of one campaign that we carried out using this approach.
Disclaimer about Sendgrid: In the last couple of months, Sendgrid clients have been targeted to send phishing emails. Not only that, but using this relay can even allow you to spoof certain domains since sometimes sysadmins add huge relay net-blocks to their SPF records, and these would allow you to spoof email coming from their domain, as long as you use the same relay they whitelisted.
Sendgrid probably took notice of these two facts since the last time we tried to use it, they had put a whole new process in places to verify that you’re working for a company before letting you use their relay, so keep in mind, YMMV.
10 tips to improve your effectiveness.
To end this write-up I would like to give 10 tips that I’ve learned (most of the times by making mistakes) that will help you increase your campaign effectiveness. I can’t get in depth into most of them since this write up would become tedious, but I think they a brief summary will be helpful.
1) Try to avoid text content whenever possible. There are a multitude of anti-spam and anti-phishing detection bots that look for specific keywords. But it’s not easy to do the same thing for images. Always try to prioritize graphic content that’s not easily searchable.
2) If you need to use text, look into automated scanning obfuscation techniques. One technique that’s made a comeback recently but that’s actually over 10 years old is using user-hidden characters like soft hyphen to change the text for automated scanners but not for the end user. You insert characters like these between random letters in common search strings, and you might be able to bypass some regex like filters.
3) When spearphshing, try to do proper research on the victim. Sure, it’s useful to know the victim’s interests to elaborate a custom email with attractive content, but it’s also really useful to know technical data such as the victims OS / email client. For example, if you’re using tracking pixels (pixels embedded in HTML code to register your origin IP), you’ll have results that depend on
a. The email provider: Google automatically proxies the requests, so you’ll only get google’s servers IP.
b. The email client and/or platform: for example, Apple Mail for Iphone doesn’t behave the same way as Thunderbird in Unix.
c. The users previously set up preferences.
4) You can improve your success rate with additional social engineering attacks. On one assessment, we sent emails asking for a password reset, and after gathering most of the employees internal numbers through OSINT, called the most critical ones. We said that we were from the IT department and that we’ve had an attack, so they should do what the email said ASAP. We had a success rate of about 50% in this campaign, almost double of what we did on other similar assessments.
5) The content of the email is critical. Even if you’re not able to gather useful information through the usual means, there are still universal “hooks” which are fairly effective. Everybody, doesn’t matter the company they work at, would be tempted to open an attachment with information such as salaries. Or maybe incoming firings. Or anything else that’s private but could potentially affect them.
6) Time is critical. You should send your email on a schedule where most of the victims will be able to read it immediately. You can only send emails until a certain number of people click on “report as dangerous” until you get flagged by dynamic filters. You should also consider that people talk between them, so after a while, word is gonna spread about the company being under a phishing attack. Try to send as many emails as possible in a short time-span.
7) Always avoid sending phishing to security related people which could respond to it on a timely manner. All you need is one competent sysadmin to catalog that email as malignant, as well as block outbound traffic to your C&C / phishing site. It’s best to stick with non security related targets.
Story time: One of the companies I worked for actually got attacked on the day of a very relevant Argentinian security conference (Ekoparty). The hackers knew that most of the security team was going to be on the conference, so they cleverly choose that day. Lucky for us, one of the security engineers was working part-time and was able to respond to the attack which happened at lunch time.
8) Learn to deal with uncertainty. When working on phishing campaigns, there’s multiple things that can make it go wrong, which you don’t have control over. You depend on the amount of people that report the email, of the custom metrics that an email filter might implement (such as how long ago was your SMTP server created), on custom spam-lists… hell, you might even get blocked because your provider once had a flagged IP on its range. This actually happened to use when sending email to Hotmail from a Digital Ocean instance.

9) Always, always, ALWAYS use TLS on your phishing site. With projects like Lets Encrypt which give you free TLS certificates you have no excuses not to. I can’t stress enough how important it is for users to trust you to have that green lock on their URL bar. Not only will it help with user “trustability” but it might also help you increase your score on spam filters. Remember that anytime you send an email with a link, that link will be scanned and check against multiple blacklists, and having a certificate might increase your chances of passing it. The process is really simple and it’s one of those things that will set you apart from a lot of the basic phishing attacks.
10) Automate whatever you can. Your domain / SMTP will get flagged in a day or two, and after that they’ll be worthless. This is one of the reasons why you should always choose the cheapest instance your cloud provider offers, as well as the cheapest domain. All of your setup will only be good for one campaign and one campaign only. So automate your setup and destroy everything once you’re done.
Conclusion
There were a couple of things which I intended to cover but will do in future write ups to keep this one brief. First, all the OSSINT process you need to conduct to gather good information about your target. Secondly, things to consider when setting up a Phishing website.
Anyways, I think I covered most of what I wanted to transmit. Let me know if you think I missed something, Social Engineering attacks (of which Phishing attacks are a part of) are always changing and there’s always room for improvements.